Using the HUD
ThirdRails comes with a fully configurable HUD. Executing using the HUD is enabled if:
1. You choose a Real Drive or TS Drive
2. You ride a timetable through the "Start Service" menu
3. You load a timetable in the Prepare Your Broadcast from from the main form
4. You broadcast a ride without a timetable. (The timetable panel will not be available)
Start Service: Preparing your ride
Coming from the Real Drive or TS Drive selection form the Prepare Broadcast form will be filled with info from the source. (Option 1,2)
You can complete the info with f.e. stock info.
If you start your broadcast from the main form (option 3,4) you will have to add all info as-well-as a timetable if applicable.
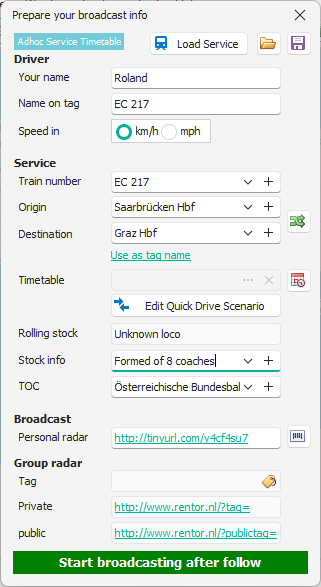
Once you are satisfied click "Start Broadcasting after follow"
The HUD Config panel will popup.
The HUD Config panel
With the config panel you will be able to setup your ride.
The panel consist of four sections:
1. Drive Section
To Start Driving you simple click the "Drive Now" button. When you start to drive the HUD will show. (Talk about that later)
When driving and you are not driving a Real Drive in real time you are able to pause the time using the || Pause button.
2. Announcement Section
Here you activate your service guard, which will bring Spoken Announcements for your timetable as well as adhoc service announcements.
You can select your voice configuration which you can create using the Announcment Builder.
3. Time Setting
In this panel you can alter the time where the buttons are based on the actual stop you are at.
This does not work for Real Drives in Real Time.
4. Timetable Setting
You can use this section to navigate the timetable without announcements using the redo/undo button as well as the "Next Stop", "Approach" and "Calling At" announcements using the play buttons.
Beware that normally you will do this using the HUD which we will discuss below.
Through the Folder Button you can edit the timetable just in time if necessary.
FYI this section used to be the so called EbuLA device in previous versions of ThirdRails. Most functions in this section are now carried out using the HUD.

The HUD
The itself has three panels which you can configure as you like.
1. The HUD panel
The HUD panel is the panel which will sit in the right side top of you screen. It shows the current station, time, Arrival and Departure information.
Besides that it Optional shows Next Stop, Approach and Calling At buttons. Once you are used to the short cuts of those buttons you will probably want to hide them through the HUD settings panel.
For more on how to execute a timetable using the HUD please refer to the section Execute a timetable using the HUD

The HUD panel consists of two additional sections:
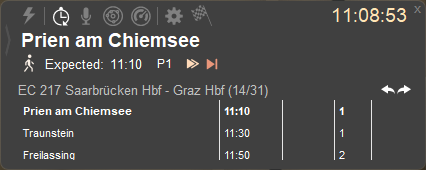
- Timetable Section
Showing the current progress of your ride and offering to navigate back or forward in case you made a mistake or start at another station.
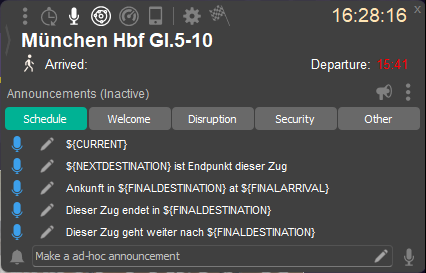
- Service Announcement Settings
Here you can make a service announcement which will be spoken by your guard and shown on your radar tag.
You can also sound a gong and let the complete service speak out using the microphone button.
You can type your text and save it for later use by clicking +. To use parameterized announcements click ... to compose them.
2. HUD Radar
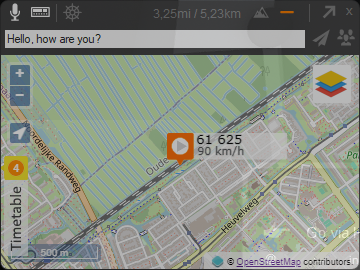
You can show the HUD radar by clicking the radar button on the HUD panel.
The HUD Radar shows the Community Radar. Here you can follow your ride on the map and chat with other drivers by means of the radar tag.
There is also an option to use Steam Chat for a better Chat experience.
Optional the radar can show the driven miles and elevation.
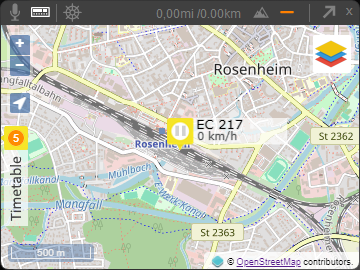
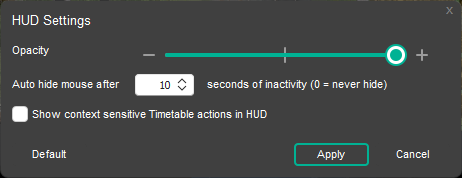
Via the settings Cog icon you can alter the settings;
- Opacity
- Show/hide context sensitive Timetable action buttons in HUD.
ThirdRails can hide the mouse after a given amount of seconds.
Created with the Personal Edition of HelpNDoc: Step-by-Step Guide: How to Turn Your Word Document into an eBook